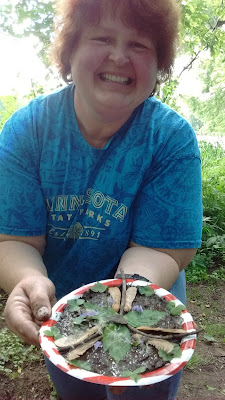
This week has been anything, but normal. We are participating in the Vacation Bible School (VBS) at Living Faith Church . While an honor to be apart of this fun experience, it changes the routine of our classroom dramatically. Anyone who works with children understands the value of routine and its importance to children. This week has had me reflecting on chaos and how I handle it as well as how my reactions affect the children looking for me to be the one stable element in the whirl wind of fun.
Creating messy play and art can be like the VBS week. The fun can become overstimulating and affect the normal routine of the day. Setting up and then clean up can cause the classroom to feel in commotion. Especially if you are trying to follow a schedule, meet rule 3 requirements and keep some order in the room.
Learning to recognize that chaos can be controlled and realizing your reaction and responses affect the children in your care can go a long way in helping the high energy and confusion seem less like mayhem. Developing strategies to handle the heightened energy and mess can aid in helping reduce your stress level and help the children feel more in control of their creativity process.
So a few recommendations:
Preparation is key.
Gather the materials you will need ahead of time.
Don't just collect the art materials. Plan out your set up, and clean up.
Are you painting? Then consider having a washing station set up with soapy water and towels. Have a bucket handy to drop dirty brushes in. Keep old towels nearby for spills and splatters.
Know what the children not participating in the project will be doing before and after their turn. Maybe today you bring out something they do not always have available, perhaps you limit the items they can choose to explore while you are overseeing the art project.
Expect a Mess.
Part of the reason you are supplying this experience is because of the open-ended learning you want your children to encounter. This means giving them freedom to be messy and yourself permission to ignore the mess.
Figure out your comfort level and then ways to meet your needs and still allow the children their freedom. I love to use glitter and sand with my class. However, I really despise what feels like never ending cleanup. I have discovered for me bowls or shakers of sand or glitter work best for me and I fill them in small amounts and refill as needed. Second, I prefer to do these explorations outside. Glitter and sand spilled outside is far less frustrating to me than a mess I cannot seem to get swept up or washed up.
Take a Deep Breath.
Relax and let go of your tension. Several deep breaths, quiet music and just letting go can really affect your mood. By calming yourself you can often calm the children around you.
Ask yourself these questions:
Why do I feel anxious, upset or trapped at this moment?
Is there really any reason this material or project can not be done this way? (Does it cause a safety issue? Is it destructive or wasteful?) If the answers to the questions, in brackets, are no, then try to figure out what is causing you the stress and how can you allow the child the freedom in their creative process and lower your anxiety level?
Embrace the Learning.
Step back and observe. What do you notice?
What are the children saying? What words are they choosing and why? What conclusions are they making about what they are experiencing?
Name the learning taking place. Look at the Literacy, Science, Math, Physics, Social and Emotional skills being learned and used.
Take a moment to just enjoy the wonder happening before you. Embrace the joy and release your stress and expectations.
Don't give up try again and again until you realize the experiences are exciting for you too.
Process based art that can be done with children 6 months through grade school an beyond. Inspired by the Reggio Emilia Approach.
Wednesday, June 21, 2017
Saturday, June 17, 2017
Moon Flowers: Collaborative Art Created by My SonFlowers
I discovered this link on Pinterest:
After reading the blog Art Class With LMJ, I was drawn to these flowers. We create a lot of our art outdoors. We also garden every year at our school; and had just completed putting plants into this year's garden. Now seemed to be the perfect time to do this project.
I made it a 2 day, multiple step, process for the class and mixed the art mediums I provided. I chose art materials we had recently used. I did this so that they were familiar with the components and only had to focus on the collaboration process.
Day 1: The petals were created by painting 18" by 24", white. poster board. We used liquid watercolor paints and a spray bottle of plain water. As the brush stokes dried we re-sprayed the poster board with water causing the paint to mix, run and blend. I let the children paint until they declared a board was finished. We then hung it to dry on the fence. Once dried we folded the poster board into quarters, traced petal shapes on them and cut them out.
Day 2: I hung scraps of yellow tag board on the art lattice we use for our easels and cups full of chalk pastels. Again, I let the children draw and smear the pastels until they declared the process complete. We then traced circles using a Styrofoam bowl onto the tag board.
Assembly: We spread glue around the rim of the circles and children worked together to assemble flowers. Some were completed with a single layer of petals; others they chose to have a double layer of petals. They worked until they had used up all of the petals and flower centers.
They were fascinated by how these flowers resembled the daisies we had used a week earlier in our mud play.
We hung them on the fence to dry and then made sure the petals were well anchored by supporting the glue with masking tape on the backside. The question of how to display them came up and an old canvas we had re-purposed once before was pulled back out. .
We left some petals loose and then curled them around our fingers to give a 3-D, relief look to our finished product. As we were discussing the flowers one child said, "Those look like moon flowers!"
I asked, "Where would you find moon flowers?" After a few thoughtful moments and puzzled stares the class announced, "In the garden silly!"
This project provided the class with a chance to share ideas, develop communication skills and learn to work together in close proximity. They were able to share thoughts collectively and work on compromises when ideas were conflicting. They learned to value each others thoughts and ideas.
Note: I used florist grade, hot glue pillows to assemble the flowers onto the canvas as the children directed me on where to place each blossom. This glue is stronger than hot glue gun glue and holds better. You need a mini electric skillet to melt the glue pillows but it is great for heavy items or items that might get damp. Most craft stores sell the glue pillows in the wedding area or silk flower area of the store.
I made it a 2 day, multiple step, process for the class and mixed the art mediums I provided. I chose art materials we had recently used. I did this so that they were familiar with the components and only had to focus on the collaboration process.
Day 1: The petals were created by painting 18" by 24", white. poster board. We used liquid watercolor paints and a spray bottle of plain water. As the brush stokes dried we re-sprayed the poster board with water causing the paint to mix, run and blend. I let the children paint until they declared a board was finished. We then hung it to dry on the fence. Once dried we folded the poster board into quarters, traced petal shapes on them and cut them out.
Day 2: I hung scraps of yellow tag board on the art lattice we use for our easels and cups full of chalk pastels. Again, I let the children draw and smear the pastels until they declared the process complete. We then traced circles using a Styrofoam bowl onto the tag board.
Assembly: We spread glue around the rim of the circles and children worked together to assemble flowers. Some were completed with a single layer of petals; others they chose to have a double layer of petals. They worked until they had used up all of the petals and flower centers.
They were fascinated by how these flowers resembled the daisies we had used a week earlier in our mud play.
We hung them on the fence to dry and then made sure the petals were well anchored by supporting the glue with masking tape on the backside. The question of how to display them came up and an old canvas we had re-purposed once before was pulled back out. .
We left some petals loose and then curled them around our fingers to give a 3-D, relief look to our finished product. As we were discussing the flowers one child said, "Those look like moon flowers!"
I asked, "Where would you find moon flowers?" After a few thoughtful moments and puzzled stares the class announced, "In the garden silly!"
This project provided the class with a chance to share ideas, develop communication skills and learn to work together in close proximity. They were able to share thoughts collectively and work on compromises when ideas were conflicting. They learned to value each others thoughts and ideas.
Thursday, June 15, 2017
Water & Wonder Go Hand in Hand
After doing an interview with Tom Bedard and taking several of his classes I saw that my sensory experiences were getting stale. Kids were not engaging with the sensory table and when they were, the play was not always positive. Tom Bedard sparked my inner child and these photos are some of the ideas he ignited in me.
I went to the local Fleet Farm and purchased a variety of plastic tubing, and funnels. I added an old sprinkler and took a milk crate and ran the tubes through the crate. The result is this contraption. I anchored the tubing with duct tape to help keep it from slipping out but it can easily be rearranged when it becomes necessary to change it up again. Some parts are loose so they are able to be moved at any time as the children desire to try new things.
I often add food coloring or liquid watercolor paint to the water so it is easy to watch it progress through the tubing. It is fun to watch the children guess where the water will come out and track it through the tubing to see if they are right.
Basic science is explored as hypothesis are made about what will happen and where the water will travel. Self help skills increase as water is transferred from bucket to funnels. Balance, persistence and spacial concepts develop as children move around each other. Language development is on going as well as literacy. Gross motor and fine motor skills are honed as children play. The learning that takes places is intensive. I encourage you to just sit back and watch.
We have used it inside in the sensory table and on hot days we take it outside and find a way to set it up. My goal is to some day create one on the playground fence that can always invite creative play and water our gardens too.
If you are inspired by these pictures check out Tom Bedard's Blog: Sand and Water Tables and his Facebook page: Sand And Water Tables
Sunday, June 4, 2017
The Magic of Mud
I just loves these photos. They bring me right back to the moment. I feel the joy, hear the giggles and see the concentration as they (in the words of my oldest niece, Elizabeth), "Make concoctions".
The science of solid to liquid and liquid to solid is fun to explore in this environment. It is a safe place to try experimenting. Though they don't know it yet they are making hypotheses and then acting on those hypotheses to create results. They are learning cause and affect, experiencing a controlled study and learning about the properties of their subject matter.
To them they are making concocations, creating soup and cakes. They are getting wet and dirty and no one is telling them to stop. For a moment they are engrossed in their passion for play. I feel blessed to be allowed to sit on the side lines and occasionally be invited in their world of wonder.
Don't miss this gift. Dive in and join your children in this play.
Friday, June 2, 2017
The Miracle of Mud.
Take time to contemplate that fact.
Rich, warm soil, fragrant with the smells of decomposing vegetation, moist earth, and rough texture from rocks and sand against your fingers. Imagine adding cool, fresh water to that dry dirt.
Feel the two mix together. The warm soil mixing with the cool water works to even out the two different temperatures at the same time the different textures mix together.
Can you imagine the mud clinging to your fingers? It is wet, slippery and smooth, but as you explore these sensations it begins to dry on your skin. It transitions to dry and rough. It flakes away as you rub your hands.
Wet you can mold and form it. Dry it crumbles and falls apart. Your personality will cause you to be polarized towards one of these experiences.
Making my own mud pie. |
Imagine the wonder from a child's perspective. Slow down and just be in the moment. I did. I was surprised at how calming it was, how relaxing and rewarding.
Check out my Facebook page:
https://www.facebook.com/FromFingerprintsToMasterpieces/
Thursday, June 1, 2017
Day 1 Getting it Together
About a year ago I started a Facebook page titled FROM FINGERPRINTS TO MASTERPIECES.
It has become a passion of mine to help others discover process based art and see children inspired by the Reggio Emilia Approach. This blog will help me take it to the next level and share more in depth and hopefully reach more people. Stay tuned as this is all evolving and growing starting today. Please feel to email me at fromfingerprintstomasterpieces@gmail.com.
Helen
https://www.facebook.com/FromFingerprintsToMasterpieces/
Helen
https://www.facebook.com/FromFingerprintsToMasterpieces/
Subscribe to:
Posts (Atom)
More Ways to Connect
Check out my Instagram account fromfingerprintstomasterpieces
email me at fromfingerprintstomasterpieces@gmail.com
Early Childhood and the Pandemic. A Year in Reflection
Here we sit a year into the COVID-19 Pandemic. While many of us are familiar with how it has affected our lives and lives of our family, do ...